Hello Lovelies,
today I'm posting a tutorial on how I make my granny squares. I'm sure there are many ,many other tutorials and you tube videos on this subject but as a few of you have asked how I personally make mine I thought I would share my method .
Granny squares are a great beginner crochet project as you only need to be able to chain , slip stitch and U.S. double ( U.K. treble ) crochet.
I expect there is much information on how to do these basic stitches online as well as in every crochet book. Getting a friend or relative to show you the basics takes some beating though :0)
The pattern is oh so simple. There are a few variations that may not immediately be obvious and a common problem encountered by some is where the rows begin to twist as the square grows. Like
this, most frustrating !
I don't know exactly what causes this to happen but luckily my method unknowingly seems to avoid this problem .
So here is how I make granny squares...
U.S. terms as usual :0)
To begin chain 4 ........
insert hook into furthest chain from hook and slip stitch to form a loop....
Chain 3 ( counts as first double crochet )....
work 2 further double crochet( D.C.) into loop........
this is your first double crochet cluster :0)
chain 2 then make 3 D.C into loop chain 2 .repeat 2 times more and slip stitch into third chain of initial 3 chain . this is you first round complete. Can you see how the 2 chains are making the corners of your square ..........
If you want to change colours at this point then fasten off . If you want to make the next row in the same colour I copied my sister in laws method of slip stitching along to the next 2 chain space like this . Slip stitch into the top of the second D.C. ...
and then slip stitch into the 2 chain space. Easy when you know how but I never figured this out by myself !
Then start round 2 by chaining 3....
and working 2 D.C. into same 2 chain space. In the SAME 2 chain space chain 2 and work 3 D.C. Forms corner of round 2 .........
Work 3 D.C. chain 2, 3 D.C. into next 2 chain space of round 1 ....
Repeat this pattern in the 2 remaining spaces then join to initial 3 chain with a slip stitch......
As I'm changing colours at this point I've pulled up a loop and finished off.........
This is how I join a new colour. First I make a slip knot like at the beginning of a chain...
Pull this tight........
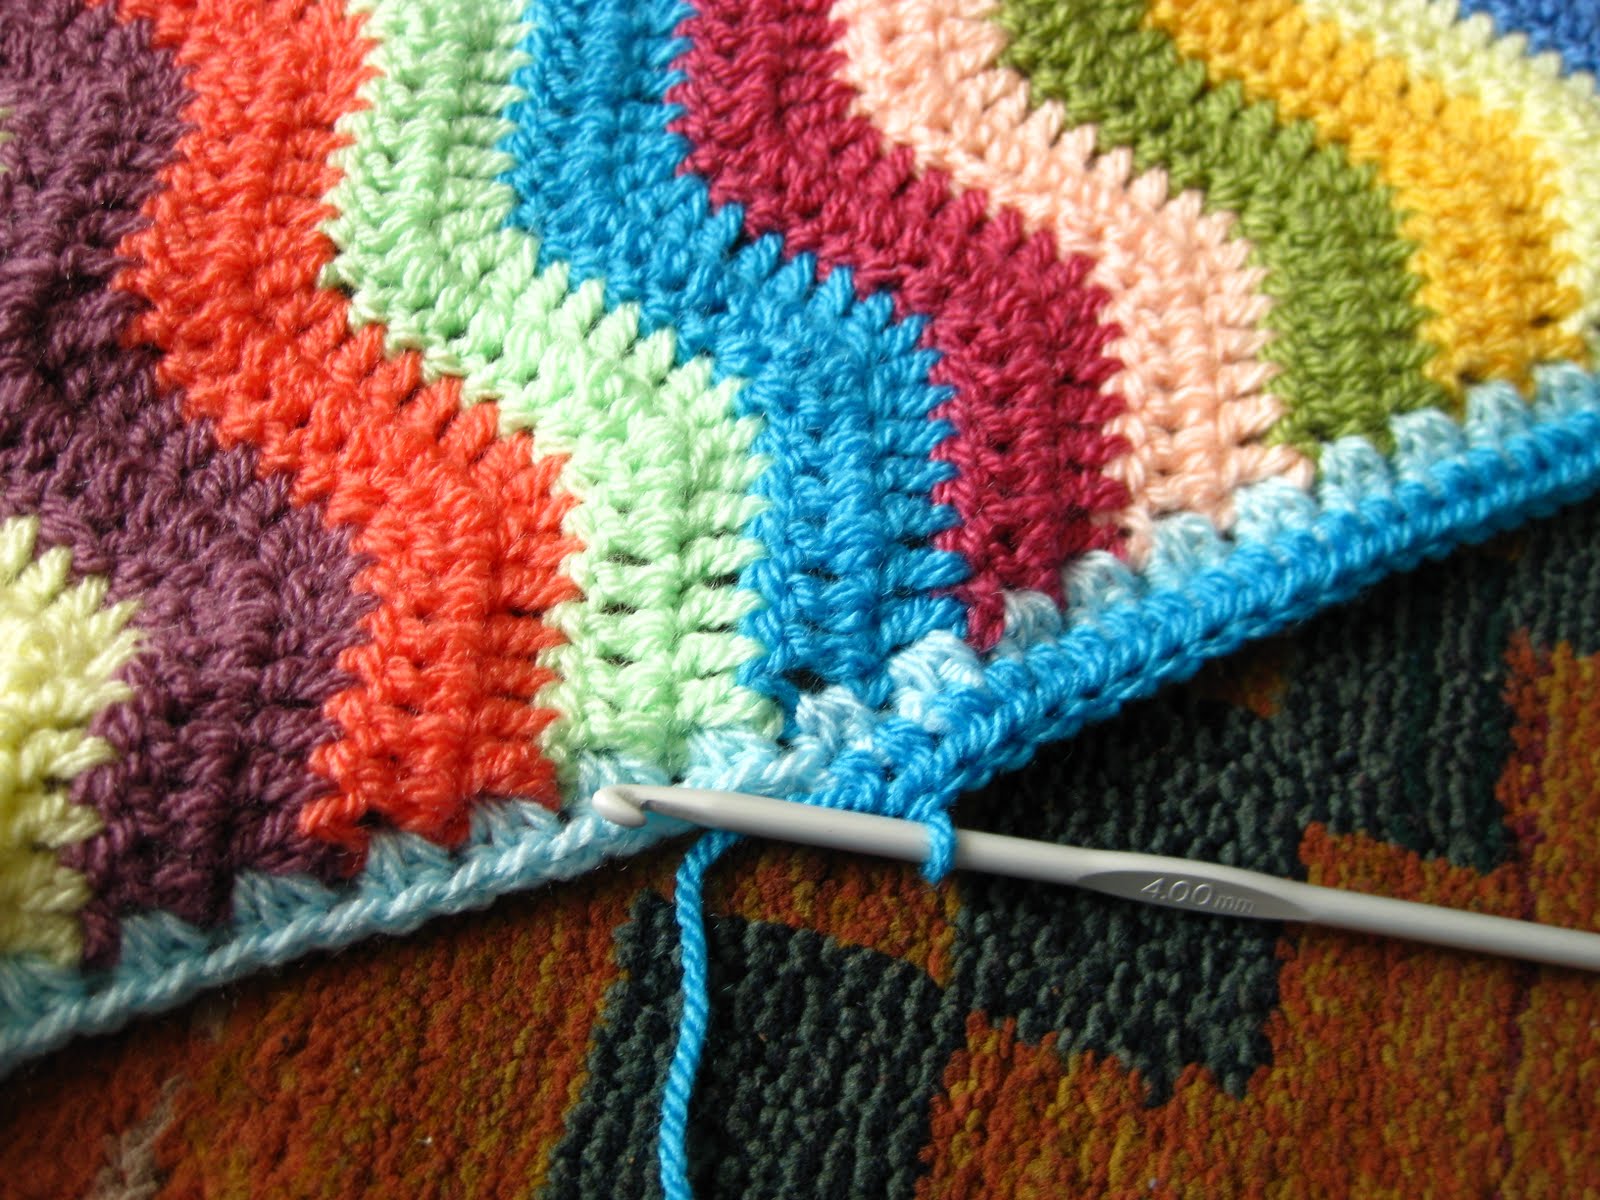
And insert hook into a space along the
SIDE of my little square. In this example I've inserted my hook from front to back , back to front is probably better, but it's not crucial with this pattern ......
Yarn over ....
pull though space and yarn on hook .....
You have attached a new colour and are ready to start round 3 :0)
Chain 3 ......
Work 2 dc in same side space......
Work corner cluster in the same way as before ( i.e. 3D.C. chain 2 , 3 D.C. )into the 2 chain corner space of round 2 .........
Along the sides work 3 D.C. clusters with
NO chain spaces.
Repeat around and finish off or slip stitch along to next space if you are not changing colour........
Round 4 . In this picture you can see I'm attaching a new colour into the space just to the left of a corner . Also it's not on the same side of the square that I attached the previous colour.......
Starting rounds on the side of the work ( as opposed to the corners ) and varying the sides used could be the reason I don't suffer the twisting problem.
complete round 4 in the same way as round 3 but you will have 2 D.C. side clusters along each side in this round.....
I'm using random colours and love rummaging in my yarn bag to select the next colours...
This could work...
Or maybe the other way round......
If you end up with a colour that looks a bit scary remember that the following round can tone it down a bit :0)
So the pattern is just repeating every round with the addition of extra side clusters , yes ? .....
In the above picture you can see I've joined the turquoise yarn 2 cluster spaces from the corner, it's not crucial exactly which space you choose.
You can see I also turn my work so random sides are used for joining a new colour. Here is the back , you can see the ends are spread about....
If you have only done one round of a certain colour the start and finish ends are quite close together so I tie these with a double knot before sewing them in...taking care not to pull the first knot too tight and distort the stitches......
I hope all this helps some of you who have encountered the twisting problem . I really hope it encourages some of you ,who havn't already done so ,to give a granny square a try .
I''l finish with 3 of my 2011 projects that have used this super easy, super effective crochet pattern...
"Vintage" Giant Granny
small square granny blanket
bright giant granny blanket
I think you can see how much fun I've been having with this pattern this year :0)
With granny squares the permutations of colour and size of square is endless. There are also many different ways to join squares and of course many,many different things you can make . From blankets to bags. Cushions to coasters and so many others I haven't even thought of yet . I think I will always love this pattern and can't really see me ever becoming bored with it's versatile simplicity .
I hope this tutorial is clear to you all . Any problems please let me know .
ENJOY.
Jacquie x